Ingredients:
For the Cake:
- 2 1/2 cups (320 grams) all-purpose flour
- 1 1/2 cups (300 grams) granulated sugar
- 1 teaspoon baking soda
- 1 teaspoon salt
- 1 teaspoon cocoa powder
- 1 1/2 cups (360 ml) vegetable oil
- 1 cup (240 ml) buttermilk, room temperature
- 2 large eggs, room temperature
- 2 tablespoons (30 ml) red food coloring
- 1 teaspoon vanilla extract
- 1 teaspoon white vinegar
For the Cream Cheese Frosting:
- 1 pound (450 grams) cream cheese, softened
- 2 cups (240 grams) powdered sugar, sifted
- 1 cup (230 grams) unsalted butter, softened
- 1 teaspoon vanilla extract
Some Cooking Tips
- Room Temperature Ingredients: Make sure that the eggs, buttermilk, and cream cheese are at room temperature before mixing. This ensures a smoother batter and frosting.
- Measuring Flour: Spoon the flour into your measuring cup and level it off with a knife instead of scooping directly from the bag to avoid packing the flour, which can lead to a dense cake.
- Food Coloring: Gel food coloring provides a more vibrant red color without altering the batter consistency as much as liquid food coloring.
- Buttermilk Substitute: If you don’t have buttermilk, make a substitute by adding 1 tablespoon of white vinegar or lemon juice to 1 cup of milk. Let it sit for 5 minutes before using.
- Chill Before Slicing: Chilling the cake in the refrigerator for about 30 minutes before slicing helps the cake hold its shape better when cut.
Instructions:
1. Prepare the Cake Pans:
- Preheat your oven to 350°F (175°C).
- Grease and flour two 9-inch round cake pans or line them with parchment paper to prevent the cake from sticking.
2. Mix Dry Ingredients:
- In a large mixing bowl, sift together the flour, sugar, baking soda, salt, and cocoa powder. Sifting ensures that these ingredients are well combined and free of lumps.
3. Mix Wet Ingredients:
- In another large mixing bowl, combine the vegetable oil, buttermilk, eggs, red food coloring, vanilla extract, and white vinegar.
- Whisk these ingredients together until they are fully incorporated and the mixture is smooth.
4. Combine Wet and Dry Ingredients:
- Gradually add the dry ingredients to the wet ingredients.
- Use a hand mixer on low speed or a spatula to mix until just combined. Overmixing can cause the cake to become dense and tough, so mix until you no longer see dry flour.
5. Bake the Cake:
- Divide the batter evenly between the two prepared cake pans. Use a spatula to smooth the tops of the batter.
- Place the pans in the preheated oven and bake for 25-30 minutes. To check if the cakes are done, insert a toothpick into the center of each cake. If it comes out clean or with just a few crumbs, the cakes are ready.
- Once baked, remove the pans from the oven and let the cakes cool in the pans for about 10 minutes. This cooling time helps the cakes firm up slightly, making them easier to handle.
- After 10 minutes, turn the cakes out onto wire racks to cool completely.
6. Prepare the Cream Cheese Frosting:
- In a large bowl, beat the softened cream cheese and butter together with a hand mixer or stand mixer on medium speed until the mixture is smooth and creamy. This usually takes about 2-3 minutes.
- Gradually add the sifted powdered sugar, about 1/2 cup at a time. Beat on low speed after each addition to prevent the sugar from flying out of the bowl. Once all the sugar is incorporated, increase the speed to medium-high and beat until the frosting is fluffy and smooth.
- Add the vanilla extract and beat until it is fully mixed into the frosting.
7. Assemble the Cake:
- If necessary, use a serrated knife or cake leveler to level the tops of the cakes so they are flat. This ensures that the layers stack evenly.
- Place one cake layer on a serving plate or cake stand. Spread a generous amount of cream cheese frosting on top of this layer.
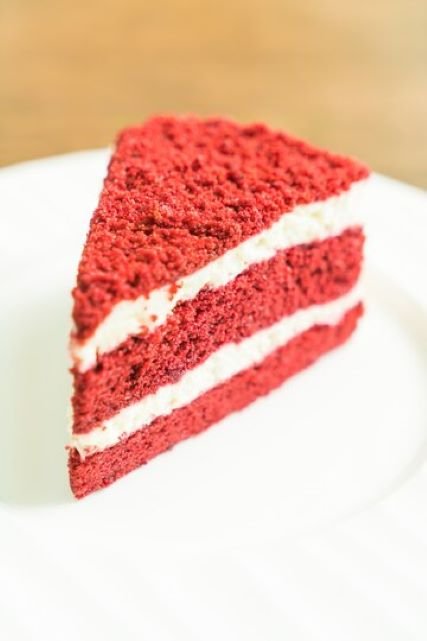
- Place the second cake layer on top of the first, aligning the edges. Spread frosting evenly over the top and sides of the cake.
- To achieve a smooth finish, use a bench scraper or offset spatula. For a rustic look, you can leave the frosting textured.
8. Decorate:
- You can decorate the cake with additional frosting piped in decorative patterns using a piping bag and tips.
- Another option is to crumble a small portion of the cake (from the leveling) and sprinkle the crumbs on top of the frosted cake for a classic look.
9. Chill Before Serving:
- Once the cake is frosted and decorated, place it in the refrigerator for about 30 minutes. This helps the frosting set and makes the cake easier to slice.
10. Serve and Enjoy:
- After chilling, your red velvet cake is ready to serve. Slice and enjoy!